Going Traditional: Why You Should Build Your Own Traditional Muzzleloader
By: Mike Reeber
When I was 19, I found this dusty cardboard box in the back of a closet at home. Much to my surprise, the box had something in it and after seeing the name on the side, I figured that it just might be a gun; so, I decided to further investigate. And, as luck would have it, it was a brand new gun; a muzzleloader in fact. After sitting there for a second, I recalled that my dad received this as a gift one year and had never finished setting it up. At first glance, it seemed like shooting one of these things was a really daunting task, so I decided to take it down to the local gun shop to see if I could learn a thing or two before taking it out to the range.
My interaction at the gun shop was one that I’ll never forget. Everyone was standing at the counter looking for their next .270 or .30-06 and here’s this college kid standing there with a half assembled muzzleloader looking for answers to a thousand questions. Fortunately for me, the owner of the store was really knowledgeable with these types of guns and got me going with everything that I needed to shoot. From there, I went on to shoot my very first whitetail buck with this muzzleloader and soon realized that I had been stung by the muzzleloader bug.
It seems like our world of hunting is chock full of advancements at just about every turn. It wasn’t all that long ago that trail cams didn’t have cell service, winter camo had you resembling the Michelin Man and aluminum arrows dominated the shelves at sports stores across the country. And much to the same effect, muzzleloading has changed by leaps and bounds itself.
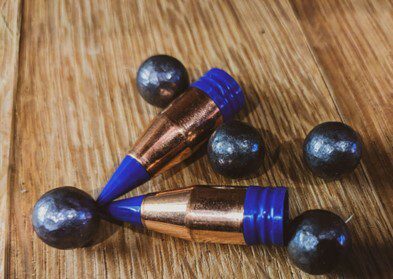
I guess that you could say that I started out somewhere in the middle of a muzzleloading era. At the time when I got started, I was shooting an in-line .50 caliber, using pelletized powder and a polycarbonate tipped bullet; a long ways away from the traditional rifles that were once used in the century prior. But regardless of the advancements, there was always something really satisfying about using one of these single shot smoke poles while sitting out in the deer woods. Maybe it was the process of loading it or maybe it was the fact that you really only have one shot and need to make it count– all I know is that it’s an addicting way to hunt.
In today’s world, the use of muzzleloaders in the hunting community is skyrocketing and for good reason. For one, many modern muzzleloaders feature free-floating barrels, lightweight stocks and the ability to break-down and clean within minutes. With the right powder, scope and bullet combination, drilling tight groups at 500+ yards is a very real thing. And, as a lot of people are now realizing, drawing a coveted tag in some western states can be just a little bit easier if you apply for a muzzleloader tag.
Recently, I decided to venture back to a part of the sport that I skipped over at the beginning; the traditional side of muzzleloading. If you’re anything like me, then you’ve seen the “build it yourself” kits in plenty of magazines or online. For years, I’ve said that I wanted to give it a shot(no pun intended), but I finally decided to go for it this year. And what better time of year to get acclimated to a new firearm than in the spring.
For me, building this traditional muzzleloader has really been a great way to explore a new part of hunting that I hadn’t before and I’m really glad that I did. Shooting this smoke-pole is not only simple, but it forces me to slow down, enjoying all of the steps that are involved to use one. Everything from developing the right amount of powder to shooting again with iron sights. This gun has brought me right back to why I got into hunting in the first place; the experience.
Thinking of adding one to your gun collection? Here’s my build and a few simple tips.
For my traditional build, I wanted a rifle with a longer barrel, .50 caliber and something that would still allow me to navigate the brush of South Texas looking for whitetail or axis. After doing some research and talking with the helpful team at Muzzle-loaders.com, I settled on building a Kentucky Rifle kit from Traditions. Being new to the traditional side of the sport, I opted for my rifle to have a percussion ignition vs. a flintlock. I figured that this was probably the right way to start my journey with a traditional rifle, given that I could easily load a percussion cap, not worry about weather as much and get used to a different type of platform.
When you think about how a muzzleloader operates, it’s really a pretty simple concept. And though one of these kits can probably be assembled in a matter of a couple of days, I suggest taking your time and making it uniquely yours from a fit and finish perspective. From start to finish, my build took me about 5 days and turned out exactly what I was hoping for.
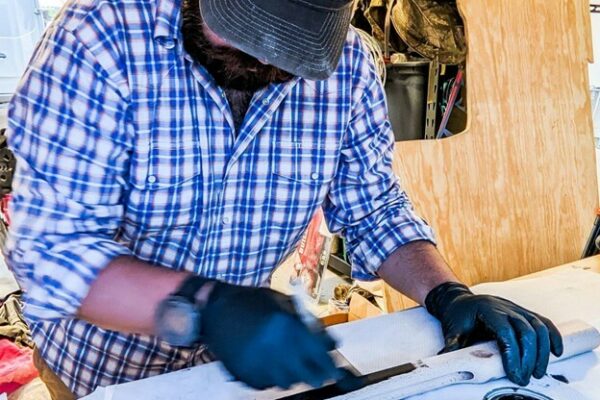
Once out of the box, I made sure that all of the required pieces were included, which they were. I’ve found that test fitting really can vary from kit to kit, after all, they are made from wood and we all know that no two pieces of wood are exactly the same. So, take the time and check to see how everything fits right out of the box. After doing an initial test fit, I realized that my rifle was going to need some adjustments in some spots, mostly around the lock. And, as is the key to most good woodworking projects, having an array of different types of hand tools at your disposal is critical. So, if you have access to a few different chisels, mallets, screwdrivers and a vise, I highly recommend it.
After a few hours of shaving down the wood in some high spots, I was left with a really great fit for the lock, trigger guard and barrel. This kit is also an interesting one because the stock is actually made up of two pieces, which are joined in the middle by some round pins. This is in part due to the fact that the barrel is 33.5’’! Now, the one tricky part is that I needed to drill two small holes in the forward piece of the stock, which then secured this piece of wood to the barrel. In all honesty, it’s not as difficult as it appears to be. Measure 12 times, drill once. Once all that was behind me, it was time to get to sanding the stock.
At first glance, I was really impressed with the wood that Traditions included. It had a really nice grain running throughout the stock and I really wanted to make sure that I took the time to sand it down to a super fine finish so that I could end up with a great looking rifle. Depending on what type of finish you’re looking for, there are a number of different routes that you could take to achieve those. For me, I was looking for more of a glossy finish, so after staining with a dark brown color, I sanded the stock all the way to a 1500 grit paper. At this point, I set everything aside to dry for several hours.
Barrel Finishing
On traditional muzzleloaders, barrel finish is usually one of two finishes. Either you blue the barrel or use a plum brown finish. I chose a blued finish to contrast the dark stain on the stock. The Perma Blue from Birchwood Casey is super simple to use and I was really impressed with the finish that it gave the barrel. Prior to applying the bluing liquid, use some steel wool or really fine sandpaper to rough up the barrel slightly.
I found that this really helps with the application of the bluing. It’s important that after applying the bluing(which can be applied in multiple coats), that you rinse the barrel with water. Essentially, this rinses any excess liquid and stops the reaction process. Rinse, dry and repeat until you get the color that you like. For my rifle, it took about 2 coats to get the finish even across the entire barrel, resulting in a deep blue finish.
Finishing the Stock and Assembly
Once the stock stain had a chance to dry, I was ready to put the final finish on the wood. As I mentioned earlier, I was hoping for more of a glossy finish, so I applied Tru-oil to achieve this. Now when I tell you that a little goes a long way, I mean the tiniest bit of oil is needed! Basically, a drop of oil on your finger will be enough to coat one side of the buttstock. For this, I used my bare hand to apply the oil, rubbing an extremely thin coating across the stock. Using this technique will help to heat the oil up and spread more evenly across the wood.
Once coated, I set everything down and let them fully dry. Between oil coats, I used some very fine steel wool to take the sheen off the stock and then applied another coat on top. Four coats later my stock looked great! I should also mention that it’s really easy to reapply future coats for a nice shine and added protection. Now, the part that I could hardly wait for, putting this traditional smoke-pole together! Since I took a bunch of time to fit all of the parts from the beginning, this Kentucky rifle went together quickly once the stock had completely dried with the last coat of oil. The finished product was everything and more than I could have hoped for.
First Shots and Final Thoughts
Taking my traditional rifle out to the range for the first time was just plain cool. At no time in my past experience of shooting rifles have I ever felt so reconnected to such a revolutionary time in firearms history. Maybe it’s the fact that you can’t just load a quick round in and shoot that makes this experience that much more enjoyable. After taking some time to inspect my rifle and lay out all of my gear, I found that 70 grains of Hodgens Triple 7 powder, a dry patch and a .490 Hornady round ball was a great combination for me to accurately hit within 50 yards of my target. I’m really looking forward to shooting this rifle more this spring in preparation for hunting an axis over the next few months.
If you’re planning on venturing into the traditional muzzleloading world, I would definitely suggest taking your time to get familiar with all of the aspects to these old style firearms. There’s so many different tools and cleaning products to understand before heading out to the range. Also, be sure to get yourself a separate range bag to keep all of your gear in, because it makes life easier and because you’re going to need it!
Enjoy the adventure and happy building.


