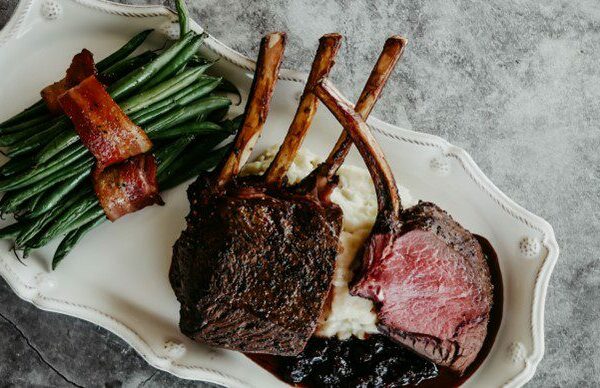
Roasted Venison Backstrap with Cherry Bourbon Sauce and Bacon Wrapped Green Beans
Well, I wasn’t sure that it was ever going to happen, but Spring has finally decided to shine here in the Lonestar State. The turkeys are gobbling, the trees are blooming and Easter is just around the corner. Now, I don’t know about you, but I’ve definitely been guilty of holding onto my venison backstraps for too long every year; know what I mean? We alI work so hard each year to bring home these prized possessions and then wait for just the right occasion to break them out. So between Easter, Spring weather and strutting Rio Grande turkeys, I couldn’t think of a better time to break-out one of the best cuts of venison in the freezer.
This recipe is simple enough to prepare for friends and family while standing around the kitchen, but is impressive enough for a holiday meal. When served with a heaping mound of mashed potatoes, this beautiful venison roast and tart cherry sauce will definitely be one of your new favorite ways to enjoy a backstrap.
Roasted Venison Backstrap with Cherry Bourbon Sauce and Bacon Wrapped Green Beans
Yields 4-6 servings
Ingredients:
½ venison backstrap, (bone-in if you have it), about 2lbs
6 oz of cherry preserves
3 TBSP of bourbon
¼ cup of water
6 dashes of Worcestershire sauce
1 lb of green beans
8 pieces of bacon, thick cut preferred
2 TBSP of freshly cracked pepper
2 TBSP of Kosher salt
1 TBSP of garlic powder
1 TBSP of ground coriander
Because this recipe has some overlapping parts, it’s important to get everything organized before you begin to cook. First, turn your oven to 400F and let it preheat. Next, fill a medium sized pot with water, add a tablespoon of salt, cover and bring to a boil.
Because this recipe has some overlapping parts, it’s important to get everything organized before you begin to cook. First, turn your oven to 400F and let it preheat. Next, fill a medium sized pot with water, add a tablespoon of salt, cover and bring to a boil.
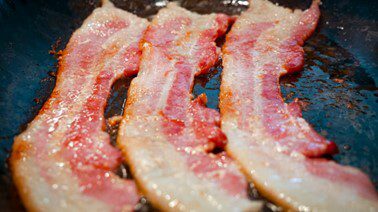
To start, place either a cast iron skillet or another ovenproof pan on your stove over medium heat. Place the individual strips of bacon in the pan and gently cook until they just start to show some color on the fat, about 8-10 minutes. At this point, we’re trying to render some of the fat so that they can be wrapped around the green beans and then will finish cooking in the oven. Remove from the pan and set aside. Do not wipe out this pan because that beautiful bacon grease is going to be used shortly!
Once the water is boiling, carefully drop in the green beans and let cook for 1-2 minutes. While the beans are cooking, fill a separate bowl with ice water and set aside.
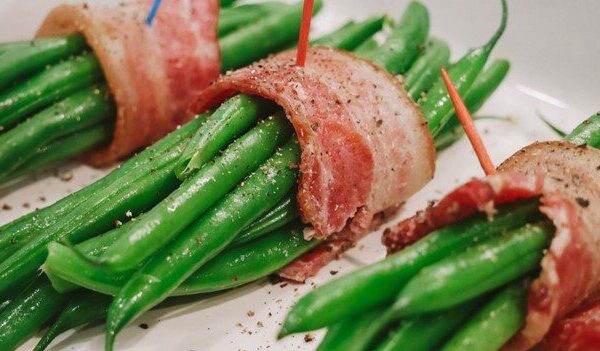
When your beans have cooked for a minute or two, take them out and place directly into the ice water to stop the cooking process. This method will also help to keep the beans nice and green. Now, it’s time to get the green beans wrapped in bacon. Personally, I prefer about 8-10 beans in each little bundle. I feel that it cooks nicely and is a good individual portion size. After they’re wrapped, stick a small toothpick through them and season with salt and pepper. Add the bundles into a baking dish and set aside.
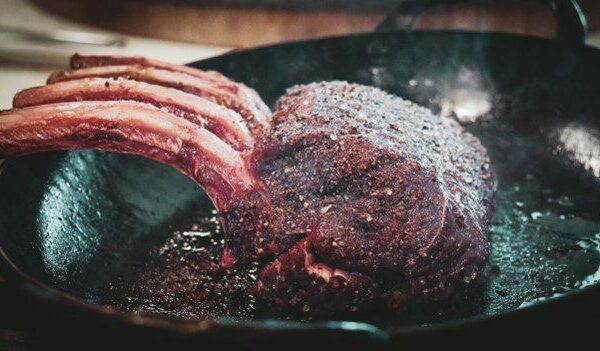
Now for the main attraction, the backstrap. Make sure that the meat is clear of any silver skin before seasoning. To season, mix together the salt, pepper, garlic powder and ground coriander in a small bowl. Be sure to give the venison a really good dose of seasoning on all sides. Helpful trick: If you want to make a better crust, lightly score the outside of the meat in an “x” pattern with a sharp knife. This will allow the seasoning to work its way in a little bit more and will brown up really nicely in the pan.
Heat the pan that was used to cook the bacon in over high heat.
At this point, it’s ok to add an extra tablespoon of oil if it looks like the pan needs a little bit more. Once hot, place the venison into the pan and brown it on all sides, being sure not to move the backstrap until each side is browned. This will ensure a great outside crust. Once the entire roast is browned(including the ends!), place the pan into the oven, along with the green beans. Roast for 15-20 minutes or until the venison is cooked to your liking.
When the venison is cooked(about 130-135F for medium rare), remove it from the oven and place the roast on a cutting board and let rest. At this time, the beans should also be removed from the oven and set aside. The bacon should have crisped up nicely by this point. Over medium heat, place that same pan that you cooked the venison back onto the stove. Deglaze the pan with ¼ cup of water and use a wooden spoon to scrape all of the stuck pieces of goodness from the bottom of the pan. Next, remove the pan completely from the heat and add the bourbon to the pan.
Always remove the pan from the heat while adding the alcohol. Place the pan back over the heat and either light by tilting the pan toward the flame or by using a lighter. This will burn the alcohol off, but will leave the flavor of the bourbon in the pan. Once the pan is no longer flaming, mix in the 6 ounces of cherry preserves and add 5-6 dashes of Worcestershire sauce. Continue to mix for 5 minutes as the sauce reduces and comes together. When ready, it should be a thin syrup-like consistency. Slice the venison, plate up the green beans and serve with the cherry sauce.


